
The only plastic we need for travel.
Easy Australian Visa Application Guide for Filipinos
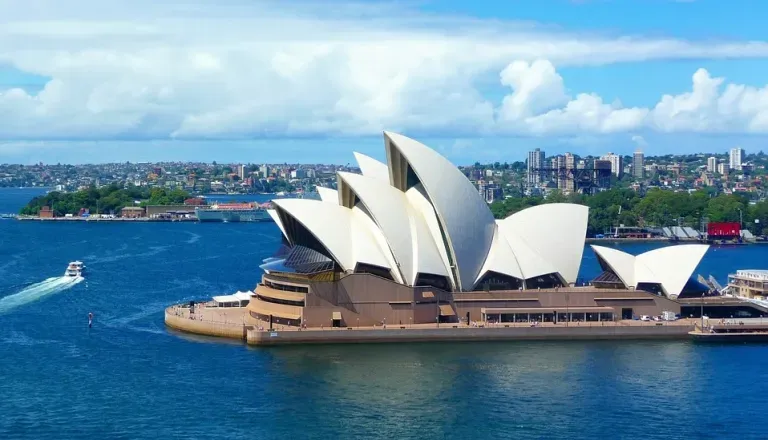
I have a confession to make: I have this dream of visiting all seven continents, hopefully before I hit the big 3-0! Thus, I have Australia on my radar this year. After all, it’s currently the only nation in the world to govern an entire continent! So if I want to achieve my goal, there’s no way I can skip it!
Also read: Thrilling Adventure Activities in Australia to Hit Up for Less than S$200
That’s easier said than done, of course, especially since I hold a third world passport! But thankfully, getting a tourist visa to enter Australia isn’t that difficult. I can say this because.. I’ve done it already! And I found it less time-consuming and troublesome than getting a tourist visa for the US, the UK or even Japan!
Here’s how I did it:
1. Know your visa type
The visa I applied for is called the Visitor visa (subclass 600). If you’re planning to visit Australia for a short period (less than a year), then this is the visa for you. It has two streams — tourist and business. Obviously, I went with the tourist stream since I’m just planning to go to Oz on holiday.
2. Check where you can apply
If you’re outside Australia and if you hold a passport from an eligible country (like the Philippines), then you can apply for the Visitor visa (subclass 600) online. For non-Filipinos, you can check if your passport is eligible for online applications by clicking here. It is also possible to lodge applications via accredited visa application centres — such as VFS Global in the Philippines — but trust me, applying online will be less of a hassle.
3. Create an ImmiAccount
ImmiAccount is the main portal for accessing the online services of the Australian government’s Department of Immigration and Border Protection. Thus, if you want to apply for a tourist visa online, you will need to create an account. Click here to register. Be sure to use a valid email address when you register as the department prefers to contact applicants electronically. Not doing so may result in processing delays, including the release of your visa application outcome.
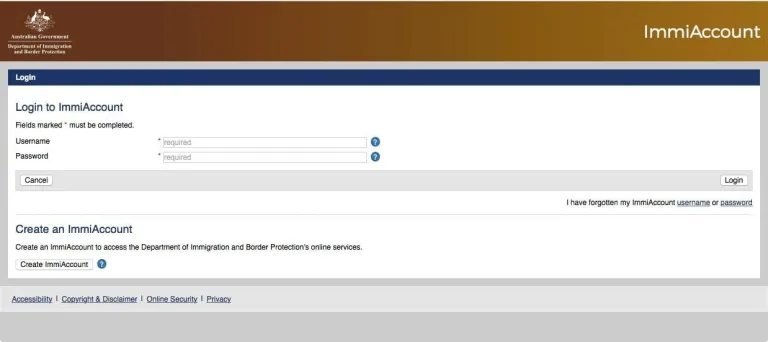
If you’re planning to apply as a group (for example, your family wants to apply together), you guys can just create one account and use this to submit and pay for multiple applications.
4. Fill up the application form
The online application form in ImmiAccount is similar to Form 1419 (Application for Visitor visa – Tourist stream), which can be found here, except you won’t need to print it out. You will be asked basic questions about your identity, travel history, employment status, financial capacity, purpose of visit, health and character so be ready with those information. The form may take a while to accomplish so if you can’t finish answering all the questions in one go, you can always come back and complete the form at a later date. Just remember to hit the “Save” and not the “Submit” button!
Important reminder: Your passport must be valid for at least 6 months from the date you plan to enter Australia. You might be denied a tourist visa if you overlook this.
4. Attach documents
Once you’re done with your application form, you will have to provide supporting documents. In my case, I was asked to upload my travel documents as well as evidence of birth or age, personal assets, work experience, financial capacity and travel history.
So I attached scanned copies of the following:
a. Birth or age: NSO Birth Certificate
b. Personal assets: Credit Card Statements
c. Work experience: Employment Contract; Employment Certificate
d. Financial capacity: Bank Statements
e. Travel history: Certified Copies of Passport Stamps; Certified Copies of Valid and Expired Visas
f. Travel documents: Certified Copy of Passport Bio page; Flight and Hotel Reservations; Daily Itinerary
Other documents that can be attached include your Marriage Certificate, Land Titles, latest Payslips, latest Income Tax Return, etc. Only a maximum of 60 documents are allowed to be attached per applicant. Check the colour of the checkmark right next to the evidence being asked for so you’ll know which ones to prioritise — red means “the document is required”, yellow/amber means “the document is recommended” and green means “the document has been received by the department”. Only certain file formats (such as .JPG, .PDF or .PNG) are accepted. Each attachment must be of good quality but must not exceed 5MB in size. To know more about how to attach documents, click here.
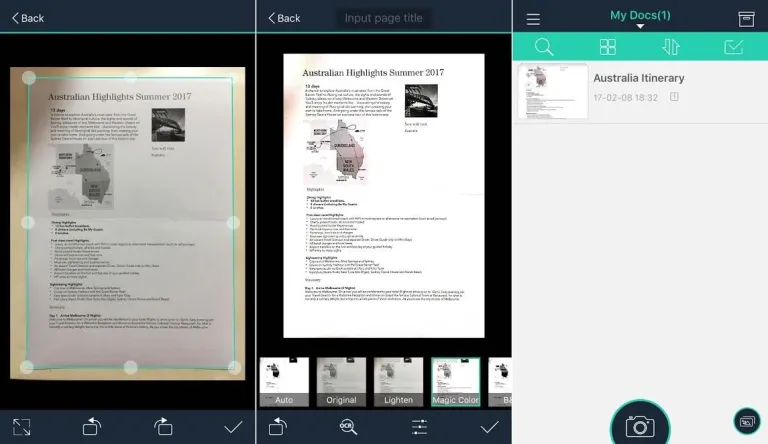
Tip: If you’re like me and you don’t own a printer/scanner, you can use your phone/tablet and this brilliant app called CamScanner to scan your documents. The app will give you sharp and clear images that you can easily email or transfer to your laptop.
5. Pay the visa fee
When I applied, the tourist visa fee was AU$135. It changes constantly, though, so don’t expect to pay the same amount. Also, since I paid via credit card, there was a surcharge. Mine was around AU$1.32. The surcharge varies depending on the payment system of your card and applies to online payments via debit cards and PayPal as well.
6. Submit and wait
After completing the application form, attaching all the required documents and paying the visa fee, click the “Submit” button. Within minutes, you should get an automated email notification acknowledging the receipt of your application. This is when the wait begins! You will not get an update regarding the progress of your application so the next email you receive from the department will already tell you if you have been granted a visa or not. My Visa Grant Notice arrived in my inbox after 2 days but some say the waiting game could take as long as a month. If you do get a Visa Grant Notice, take note of the validity (3 months? 6 months? 1 year?), travel facility (Single entry? Multiple entry?), visa conditions (No work? No study?) and entry requirements before travelling to Australia. In my case, I was lucky to be granted a one-year multiple-entry visa with a maximum stay of 3 months per arrival.
Australia stopped issuing visa labels on 1 Sep 2015 so you’ll need a printout of your Visa Grant Notice when you enter and exit Australia so remember to keep it in a safe place and always have it with you.
Also read: Family Friendly Attractions to Include in Your Australia Itinerary
That’s it for me. If you have other questions about my Australian tourist visa application experience, feel free to comment below.
Published at
About Author
Catherine Mirasol
A trader in the world of corporate finance but also a frustrated writer and photographer, Catherine admits to being a walking contradiction. Although born and raised in the Central Business District of the Philippines, this girl actually prefers searching for adventures in remote destinations than urban jungles. Follow her quest to become a "World Traveller" on <a href="http://www.thewandercat.com/">The Wandercat</a>.
Subscribe our Newsletter
Get our weekly tips and travel news!
Recommended Articles
14 Best Credit Cards for Travel in the Philippines #10YearChallenge: How Travel Has Changed Over the Decade Dat glow-up, doe!
2019 Visa-Free Destinations for Philippine Passport Holders Where will your passport bring you next?
Our 3-Day Tokyo Trip: Guide, Itinerary & Tips for Filipinos If you only have 3 days to explore Tokyo, here’s a guide for you!
8 Tricks to Successfully Grab Cheap Promo Flights in the Philippines PISO fare! Ooops, too late, all seats are sold out! Here’s what you need to do next time.
Latest Articles
Guide to Palawan Delicacies: 9 Authentic Must-Eats and Pasalubong Taste your way to Palawan!
Canada Expands Visa-Free Travel to the Philippines: Here’s What You Need to Know Filipinos can now travel to Canada visa-free!
First American Pope Elected: Meet Pope Leo XIV Historic Vatican moment unfolds
Limasawa Island: Beaches, History, and Hidden Gems Where history and island life meet
Your Complete Travel Guide to Bonbon Beach: One of the World’s Best Beaches in 2025 Bonbon Beach in Romblon just made it to the world’s best beaches list!