
Our favourite places to stay on this sleepy Cebu island.
Airport 101: A NAIA Survival Guide for First-Time International Travellers
So you’re finally going on your first trip abroad. Congratulations! It’s not easy for a Filipino traveller to plan an international trip, let alone go on one. If you’re like me, who gets paranoid easily, you’d know there’s nothing more important in travelling than having everything perfectly ironed out… or at least knowing what to do if things don’t go as planned.
In that case, you can start by familiarising yourself with the first stage of travelling overseas — surviving the airport. Specifically, the Ninoy Aquino International Airport Terminal 3, where most international tourist departures take place. Yes, tourist. If you’re travelling to work or study in another country, this guide may not be for you.
Also read: ‘Airport to Anywhere’ Now Available on Grab PH
Checking in
What to prepare: Passport, flight itinerary and cash
Duration: Approximately 15 minutes, depending on the queue
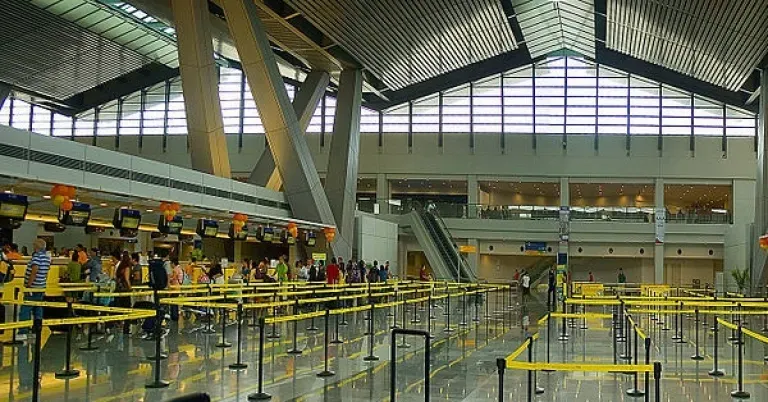
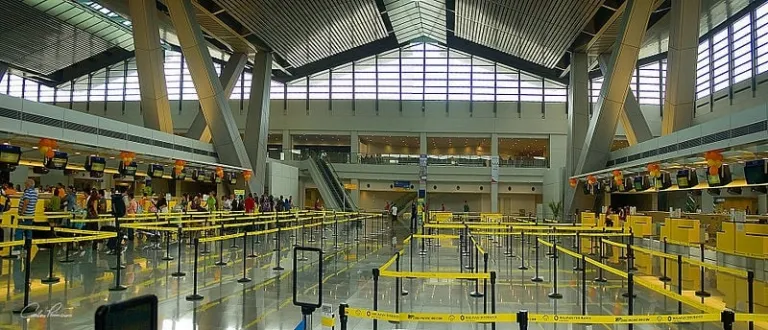
1. Find the departure area of NAIA Terminal 3 on the second floor.
Upon arriving, you’ll see that there are at least five entrances that will take you inside the facility. There are signages just above them with the names of the airlines operating in that terminal. Just choose whichever one has the least number of people in line. The last thing you need is to be stressed out from waiting too long this early on your airport journey.
2. Take out your passport and flight itinerary as required by the security officer.
Remove all coins and metals inside your pockets, and put them in a secure compartment inside your luggage or carry-on bag. Place them on the baggage screening system and go through the full body scanner. Wait for your baggage and double-check your belongings.
3. Pay the travel tax.
If you haven’t prepaid your travel tax (₱1,620), head over to the Travel Tax counters located to your left upon entering the departure area. Again, take out your passport, flight itinerary, and cash, and pay the required fee. At this point, you will need to transact at two different stalls with different personnel: one who will review your passport and flight itinerary and one who will take your payment and issue the receipt.
Alternatively, you can pay online through the TIEZA Online Travel Tax Payment System. It will only take a few minutes!
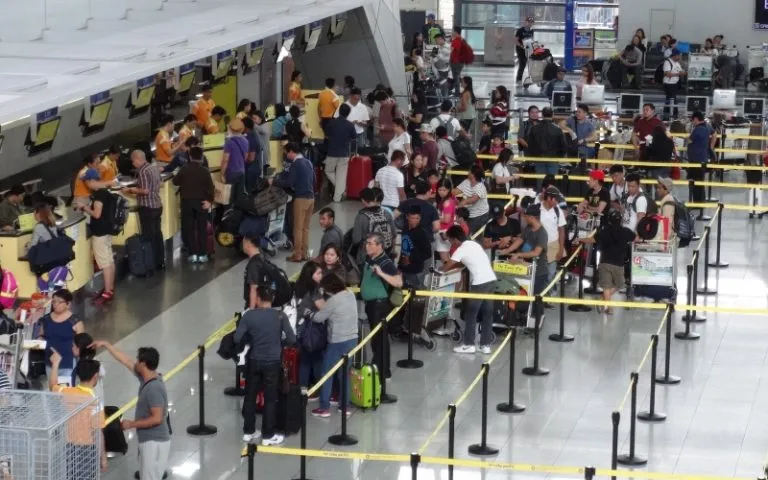
4. Check-in at the counter.
Check-in counters spread across the airport. Your airline will have a station on the floor, so head towards their area. Airline staff members will be stationed nearby to assist in finding the correct flight queue.
You’ll also find signages for flights already accepting passengers for check-in. If your flight is still closed for check-in, you can sit on one of the benches facing the check-in sections. If it’s already open, proceed to queue immediately. There’s usually one line for the same flight. But depending on the number of available check-in agents, more than one passenger can check in at the same time.
5. Present your passport, flight itinerary, and travel tax receipt.
The agent will then ask you to weigh your baggage. This is where you’ll leave your belongings as the agent sends them for screening, and eventually, to your plane.
In some cases, the agent might also ask you to weigh your carry-on bag. Make sure it’s no more than seven kilograms so that you won’t have to check it (and pay a steep fee).
If everything goes well, the agent will issue your boarding pass and give back your passport and flight itinerary.
Tip: Some airlines have already installed self-check-in kiosks, which you can use to print your own boarding pass, near the counters. However, if you have baggage exceeding the normal carry-on size, you are still required to queue at the check-in counters.
Also read: 12 Hotels Near Manila Airport (for When Your Flight Is Too Early)
Immigration
What to prepare: Passport, flight itinerary, hotel accommodation, boarding pass, departure card and pen (also company ID, Approved Leave of Absence and DSWD Clearance in special cases)
Duration: Approximately 10 minutes, depending on the queue
6. Proceed to the immigration area and convert currencies.
After claiming your boarding pass, you can proceed to the immigration area. If you haven’t exchanged money yet, you can do so at the designated counters not far from where you checked in. There are two stalls in this area, and it’s best to change your local bills to US dollars first. Upon arriving at your destination, you can then change those US dollars to the local currency for better rates. Bank stalls and more exchange counters are also found on the first floor at the arrival area of Terminal 3.
7. Say goodbye to your family or friends.
Passing immigration also means you officially have to bid farewell temporarily to your family or friends who accompanied you to the airport. Non-passengers can enter the airport through the leftmost entrance upon arriving at the airport. They are only allowed to accompany you to the shops and restaurants found on the third and first floors.
8. Present your boarding pass at the immigration.
After settling everything, you can go to the immigration area wherein an officer will first ask to see your boarding pass. Upon passing, you can go to the left side of the entrance to grab a departure card. Bring out your pen so you don’t have to fight over the few available ones in this section, then start filling out the card. You will need to write out, among others, your flight number, passport number and hotel address. It’s best to have these details written down on a piece of paper that you can easily put in and take out of your pocket. This saves a lot of time bringing out your passport or boarding pass.
9. Line up at the booth for Philippine citizens.
Taking pictures is not allowed in this area, so keep your phones and camera away. Make sure to arrange your documents properly to easily present them to the immigration officer, saving you time at the counter. These documents typically only include your passport, boarding pass, flight itinerary, hotel accommodation and departure card.
10. Present your documents to the immigration officer.
Walk up to an available counter, say a quick greeting and present these documents to the immigration officer. They will then ask you questions which you should respond to promptly and confidently. Otherwise, you’ll give the impression that you’re trying to hide something from them which might make you a prospect for offloading.
It’s important to memorise your flight and trip details including your length of stay and hotel name. They may also ask you about your job. The trick is to say as little as possible so the officer has no reason to interrogate you further.
11. Undergo the finger and facial scanning procedure.
Once the officer accepts your answers, you will undergo a finger and facial scanning procedure. Remove your eyeglasses or caps at this point or even earlier, and don’t wait for the immigration officer to tell you. Upon completion, and if the officer has no more questions, they will hand you back your documents except for the departure card. Don’t forget to thank the officer too!
12. Proceed to the second security screening.
Leave the counter and line up at the second security screening just a few steps away. Take off your shoes, belts, leftover coins, phones, and other metal items from your pocket, which you can put in the trays provided in the area. Again, you will need to put all your bags on the screening system, after which you can proceed to the officer waiting at the other end of the full body scanner. Once completed, collect and double-check all your items and prepare for the last part of your airport experience.
Boarding
What to prepare: Passport and boarding pass
Duration: Approximately 45 minutes, depending on how early you finished the first two main steps and whether your flight is on time or not
13. Look for your departure gate.
Upon passing the final security screening, watch out for signs just in front of you that will tell you where the departure gates are. Double-check your boarding pass for this information, and follow the signs that will lead you to your designated area. Try not to mistake the information as it will be a long way back to your starting point after you’ve taken the wrong direction.
14. Use the restroom, buy snacks, and relieve yourself while waiting.
While looking for your gate, you will pass by comfort rooms as well as more restaurants and retail shops where you can buy some snacks that you can munch on while waiting to board your plane or while on the plane. If you’re buying food, go for take-out so you don’t miss announcements regarding your flight at your boarding area.
15. Wait for the boarding call.
After finding your boarding gate, find an available spot, ideally closest to the boarding counter or the power outlets. Feel free to do anything in this area until a final boarding call is announced. Make sure not to put on any earplugs or earphones so you can hear these announcements clearly.
16. Follow the boarding call.
Once a boarding call is made, fix your things and take out your boarding pass. Airlines follow a boarding protocol wherein business class and special passengers are prioritised, followed by passengers seated at the back of the plane, moving all the way to the front. Follow this to avoid any problems with the airline crew or the other passengers. If you don’t like waiting in line for too long, you can stay in your spot and stand up only when the line is almost finished.
17. Present your boarding pass at the departure gate.
When it’s your turn, present your boarding pass and wait for the airline personnel to give you back your copy. Then, follow the hallway that will take you all the way to the plane entrance. Upon entering, you may present your boarding pass to the greeting cabin crew for additional instructions, or find your seat yourself.
Be careful while walking through the aisle so you don’t hit other passengers’ faces with your bags, as there’s very little space. After double-checking your boarding pass, look for your seat number written on the side of the overhead compartments. Place your bigger bag in the compartment, and keep only some essentials with you on your seat such as food, a personal blanket and pillow (if the plane doesn’t offer these), earphones and books among others. And finally, wait for your plane to take off.
Also read: 15 Struggles of a First-Time Filipino Traveller Abroad
COVID-19 precautions to keep in mind
As the COVID-19 pandemic subsides, precautions become much looser when it comes to departures. However, there is one important thing to remember when travelling post-COVID. A few countries may require you to fill up a health declaration a few days before your flight. Be sure to check out their requirements first, at least a week or two before flying.
And just in case airport security asks, have a printed VaxCert at the ready as evidence that you are not a health risk as a tourist. And since we’re talking about COVID precautions, pack a few face masks before boarding your flight. The cabin crew might require this from you.
Also read: 10 Best Airports in the Philippines That Are Truly World-Class
Easy enough for you? It gets better every time, trust me. Once you’ve gone through these steps on that first trip, you’ll turn into a pro before you even know it. For a hassle-free experience, make sure to leave more than enough time to do the above procedures by arriving at the airport around four hours prior to your scheduled departure. This is the standard rule for international flights. Also, don’t be afraid to ask airport personnel and your fellow passengers for help, or simply read signs wherever available. Good luck!
Facebook image credit (L-R): Ninoy Aquino International Airport | Official Facebook Page
Published at
About Author
Joser Ferreras
Joser is a senior writer for TripZilla based in Manila, Philippines. He mostly covers travel, people, and business.
Subscribe our Newsletter
Get our weekly tips and travel news!
Recommended Articles
10 Bantayan Island Resorts, Hotels, and Rentals for Your Tropical Escape 10 Best Banawe Restaurants for a Mouthwatering Food Trip in QC The promise of new flavours beckons from Banawe.
14 Best Credit Cards for Travel in the Philippines The only plastic we need for travel.
10 Best Mountain Cafes in the Philippines for Your Peak Coffee Experience Coffee date on the mountains, anyone?
10 Commandments for Responsible Travel Flexing Spread the good word!
Latest Articles
Every Disneyland Park You Can Visit Worldwide Where Disney magic lives
Guide to Palawan Delicacies: 9 Authentic Must-Eats and Pasalubong Taste your way to Palawan!
Canada Expands Visa-Free Travel to the Philippines: Here’s What You Need to Know Filipinos can now travel to Canada visa-free!
First American Pope Elected: Meet Pope Leo XIV Historic Vatican moment unfolds
Limasawa Island: Beaches, History, and Hidden Gems Where history and island life meet